Fix Rusty Tools: A Comprehensive Guide to Restoration and Prevention
Rust is the bane of any tool owner’s existence. It corrodes metal, weakens structures, and renders once-reliable implements useless. But before you resign your rusty tools to the scrap heap, know that many can be salvaged with the right techniques. This guide provides a step-by-step approach to fix rusty tools, focusing on both removal and preventative measures. We’ll delve into various methods, from simple household solutions to more advanced techniques, ensuring you can restore your tools to their former glory and keep them that way for years to come.
Understanding Rust: The Enemy of Your Tools
Rust, scientifically known as iron oxide, is a chemical reaction that occurs when iron or iron alloys (like steel) are exposed to oxygen and moisture. This process, called oxidation, creates a flaky, reddish-brown coating that weakens the metal and compromises its integrity. The presence of electrolytes, such as salt, accelerates the rusting process. Understanding this fundamental chemistry is the first step in effectively combating rust and learning how to fix rusty tools.
Why Tools Are Prone to Rust
Tools, especially those used outdoors or stored in damp environments, are particularly susceptible to rust. Frequent exposure to water, humidity, and even sweat can initiate and accelerate the oxidation process. Furthermore, tools that are not properly cleaned and oiled after use are more likely to develop rust over time. Knowing the risk factors helps in proactive rust prevention and knowing when to fix rusty tools.
Methods to Fix Rusty Tools: A Step-by-Step Guide
There are several effective methods to remove rust from tools, ranging from simple DIY solutions to more intensive techniques. The best method will depend on the severity of the rust and the type of tool. Here are some proven approaches to fix rusty tools:
Manual Rust Removal
For light rust, manual removal is often the simplest and most effective solution. This involves using abrasive tools to physically scrub away the rust. Here’s how:
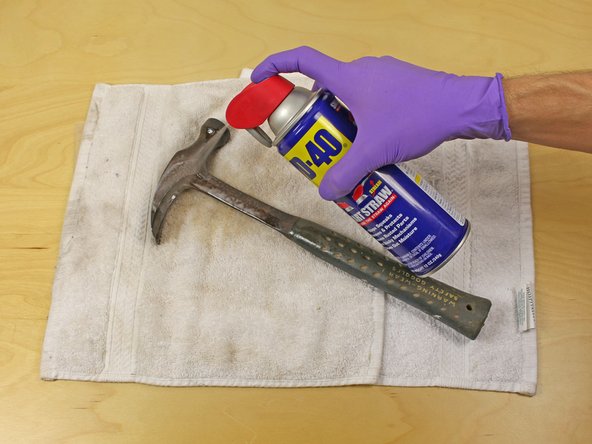
- Gather your supplies: You’ll need wire brushes (both steel and brass), sandpaper (various grits), steel wool, and lubricating oil (like WD-40 or mineral oil).
- Apply lubricant: Spray the rusty tools liberally with lubricating oil. This will help loosen the rust and make it easier to remove. Let it soak for at least 15-20 minutes.
- Scrub with a wire brush: Use the wire brush to scrub away the loose rust. Start with a steel brush for heavy rust and switch to a brass brush for more delicate areas.
- Sandpaper for stubborn rust: For rust that doesn’t come off with the brush, use sandpaper. Start with a coarse grit (e.g., 80-grit) and gradually move to finer grits (e.g., 220-grit) to smooth the surface.
- Steel wool for finishing: Use steel wool to polish the metal and remove any remaining rust particles.
- Clean and protect: After removing the rust, clean the tool with a clean cloth and apply a thin layer of oil to protect it from future rust.
Chemical Rust Removal
For more severe rust, chemical rust removers can be very effective. These products contain acids or chelating agents that dissolve the rust. Always follow the manufacturer’s instructions carefully when using chemical rust removers. Here are a few options:
- Vinegar: White vinegar (acetic acid) is a mild acid that can dissolve rust. Submerge the rusty tools in vinegar for several hours or overnight. Check periodically and scrub off the loosened rust with a wire brush.
- Citric Acid: Citric acid, available in powder form, is another effective rust remover. Mix the powder with water according to the package instructions and soak the tools in the solution.
- Commercial Rust Removers: There are many commercial rust removers available in liquid or gel form. These products often contain stronger acids and are more effective for heavy rust. Follow the instructions carefully and wear appropriate safety gear (gloves, eye protection).
Electrolysis Rust Removal
Electrolysis is a more advanced method that uses electricity to remove rust. It’s particularly effective for intricately shaped tools or those with hard-to-reach areas. This method requires some basic electrical knowledge and safety precautions. Here’s a simplified overview:
- Gather your supplies: You’ll need a plastic container, washing soda (sodium carbonate), a battery charger, a sacrificial anode (a piece of steel), and insulated wires.
- Prepare the electrolyte solution: Dissolve washing soda in water in the plastic container.
- Set up the electrolysis cell: Connect the positive terminal of the battery charger to the sacrificial anode and the negative terminal to the rusty tool. Suspend the tool and the anode in the electrolyte solution, making sure they don’t touch each other.
- Apply electricity: Turn on the battery charger. The electrolysis process will begin, and rust will be transferred from the tool to the anode.
- Monitor the process: Check the progress periodically. The process can take several hours or even overnight, depending on the severity of the rust.
- Clean and protect: Once the rust is removed, clean the tool thoroughly and apply a protective coating of oil or rust inhibitor.
Warning: Electrolysis produces hydrogen gas, which is flammable. Perform this process in a well-ventilated area and avoid sparks or open flames.
Ultrasonic Cleaning
Ultrasonic cleaners use high-frequency sound waves to create cavitation bubbles in a cleaning solution. These bubbles implode and dislodge rust and other contaminants from the surface of the tool. While primarily used for small parts, larger units are available. Simply submerge your rusty tools in the cleaning solution within the ultrasonic cleaner and let it run for the recommended time. This method can be combined with rust-inhibiting cleaning solutions for added protection. [See also: Best Ultrasonic Cleaners for Metal Parts]
Preventing Rust: Keeping Your Tools in Top Condition
Prevention is always better than cure. By taking proactive measures to protect your tools from rust, you can save time, effort, and money in the long run. Here are some essential rust prevention tips:
Clean Your Tools After Each Use
Dirt, grime, and moisture can all contribute to rust. After each use, wipe down your tools with a clean, dry cloth to remove any contaminants. For tools that have been exposed to water or other liquids, use a solvent-based cleaner to remove any residue. This simple step can significantly reduce the risk of rust formation and help you avoid needing to fix rusty tools.
Apply a Protective Coating
Applying a protective coating of oil or rust inhibitor is one of the most effective ways to prevent rust. There are many different types of protective coatings available, each with its own advantages and disadvantages. Here are some popular options:
- Lubricating Oil: WD-40, mineral oil, and other lubricating oils can create a barrier between the metal and the environment, preventing moisture and oxygen from reaching the surface.
- Rust Inhibitors: Rust inhibitors contain chemicals that react with the metal surface to form a protective layer that resists oxidation.
- Wax-Based Coatings: Wax-based coatings provide a durable, water-resistant barrier that can protect tools from rust for extended periods.
Proper Storage is Key
Where and how you store your tools can have a significant impact on their susceptibility to rust. Here are some storage tips:
- Store Tools in a Dry Environment: Avoid storing tools in damp or humid environments, such as basements or sheds. If you must store tools in these areas, use a dehumidifier to reduce moisture levels.
- Use Toolboxes and Storage Cabinets: Toolboxes and storage cabinets can protect tools from dust, dirt, and moisture. Choose toolboxes with airtight seals to provide maximum protection.
- Consider Silica Gel Packets: Placing silica gel packets in your toolbox or storage cabinet can help absorb moisture and keep your tools dry.
Regular Inspection and Maintenance
Regularly inspect your tools for signs of rust. Early detection is key to preventing rust from spreading and causing significant damage. If you spot any rust, address it immediately using one of the methods described above. Regularly check your tools to avoid needing to fix rusty tools at a later date. [See also: Tool Maintenance Checklist]
Choosing the Right Method to Fix Rusty Tools
The best method for removing rust depends on several factors, including the severity of the rust, the type of tool, and your personal preferences. Here’s a quick guide to help you choose the right method:
- Light Rust: Manual removal with wire brushes, sandpaper, and lubricating oil is usually sufficient.
- Moderate Rust: Chemical rust removers (vinegar, citric acid, commercial products) can be very effective.
- Heavy Rust: Electrolysis or commercial rust removers may be necessary.
- Intricate Tools: Electrolysis or ultrasonic cleaning is often the best option for tools with complex shapes or hard-to-reach areas.
Conclusion: Restoring and Protecting Your Tools
Rust doesn’t have to be a death sentence for your tools. By understanding the causes of rust and implementing the right removal and prevention techniques, you can keep your tools in top condition for years to come. Remember to clean, protect, and store your tools properly, and inspect them regularly for signs of rust. With a little effort, you can fix rusty tools and prevent future rust problems, ensuring that your tools are always ready when you need them.
Investing the time to fix rusty tools not only saves you money in the long run but also fosters a sense of pride in maintaining your equipment. Whether you’re a professional tradesperson or a DIY enthusiast, keeping your tools in good working order is essential for safety, efficiency, and overall satisfaction. So, roll up your sleeves, grab your supplies, and get ready to restore your rusty tools to their former glory!
Don’t let rust win! Take control and fix rusty tools!
