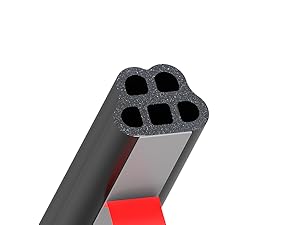
Gluing Rubber Car Door Seals: A Comprehensive Guide for Automotive Enthusiasts
Rubber car door seals are essential for maintaining a vehicle’s integrity, protecting the interior from the elements, reducing wind noise, and ensuring a comfortable ride. Over time, these seals can deteriorate, crack, or detach, necessitating repair or replacement. One common solution is gluing rubber car door seals back into place. This guide provides a comprehensive overview of the process, from identifying the right adhesive to executing the repair effectively.
Why Car Door Seals Fail
Understanding the reasons behind the failure of rubber car door seals is crucial for effective repair. Several factors contribute to their degradation:
- Environmental Exposure: Constant exposure to sunlight, rain, snow, and extreme temperatures can cause the rubber to dry out, crack, and lose its elasticity.
- Physical Wear and Tear: Repeated opening and closing of doors, as well as friction against the car’s body, can wear down the seals over time.
- Chemical Exposure: Exposure to harsh chemicals, such as car wash detergents and road salts, can accelerate the degradation of the rubber.
- Age: Like all rubber components, car door seals naturally degrade with age.
Identifying the Need for Repair
Recognizing the signs of damaged or detached car door seals is essential for timely repair. Common indicators include:
- Visible Cracks or Tears: Inspect the seals for any visible signs of damage.
- Detachment: Check if the seals are peeling away from the door frame.
- Increased Wind Noise: Notice if there’s a significant increase in wind noise while driving.
- Water Leaks: Look for signs of water intrusion inside the car, especially after rain.
- Drafts: Feel for drafts around the door edges, indicating gaps in the seal.
Choosing the Right Adhesive for Gluing Rubber Car Door Seals
Selecting the appropriate adhesive is paramount for a successful and long-lasting repair. Not all glues are created equal, and using the wrong type can lead to further damage or premature failure. Here’s what to consider:
- Rubber Compatibility: Ensure the adhesive is specifically designed for bonding rubber. Look for products labeled as “rubber adhesive” or “contact cement.”
- Flexibility: Choose an adhesive that remains flexible after curing. This will allow the seal to move and flex with the door without cracking the bond.
- Weather Resistance: Opt for an adhesive that is resistant to water, heat, and UV radiation to withstand the harsh automotive environment.
- Quick Drying Time: Consider an adhesive with a relatively quick drying time to expedite the repair process. However, avoid adhesives that dry too quickly, as they may not allow enough time for proper alignment.
Recommended adhesives for gluing rubber car door seals include:
- Contact Cement: A versatile adhesive that provides a strong and flexible bond.
- Cyanoacrylate (Super Glue): Suitable for small tears and minor detachments, but can become brittle over time. Use sparingly.
- Silicone Adhesive: Offers excellent weather resistance and flexibility, but may not provide the strongest bond.
- Specialized Rubber Adhesives: Products specifically formulated for rubber bonding often provide the best results.
Tools and Materials Needed
Before starting the repair, gather the necessary tools and materials:
- Rubber Adhesive: Choose the appropriate adhesive based on the recommendations above.
- Clean Rags: For cleaning the surfaces to be bonded.
- Isopropyl Alcohol: For degreasing the surfaces.
- Sandpaper (Optional): For lightly roughening the surfaces to improve adhesion.
- Masking Tape: For holding the seal in place while the adhesive cures.
- Applicator Brush or Spatula: For applying the adhesive evenly.
- Gloves: To protect your hands from the adhesive.
- Safety Glasses: To protect your eyes from splashes.
- Razor Blade or Utility Knife: For trimming excess adhesive.
Step-by-Step Guide to Gluing Rubber Car Door Seals
Follow these steps for a successful gluing rubber car door seals repair:
Preparation
- Clean the Surfaces: Thoroughly clean both the rubber seal and the door frame with isopropyl alcohol and a clean rag. Remove any dirt, grease, or old adhesive residue.
- Roughen the Surfaces (Optional): Lightly sand the surfaces with fine-grit sandpaper to create a better bonding surface.
- Dry Fit the Seal: Before applying any adhesive, dry fit the seal to ensure proper alignment and fit.
- Masking Tape: Use masking tape to outline the area where the seal will be attached. This will protect the surrounding paint and provide a clean edge for the adhesive.
Application
- Apply the Adhesive: Apply a thin, even layer of adhesive to both the rubber seal and the door frame. Follow the manufacturer’s instructions for the specific adhesive you are using.
- Wait for Tack: Allow the adhesive to become tacky before joining the surfaces. This may take a few minutes, depending on the adhesive.
- Join the Surfaces: Carefully align the seal with the door frame and press firmly into place.
- Secure with Masking Tape: Use masking tape to hold the seal in place while the adhesive cures.
Curing and Finishing
- Allow to Cure: Allow the adhesive to cure completely, following the manufacturer’s instructions. This may take several hours or overnight.
- Remove Masking Tape: Once the adhesive is fully cured, carefully remove the masking tape.
- Trim Excess Adhesive: Use a razor blade or utility knife to trim any excess adhesive.
- Clean Up: Clean any remaining adhesive residue with isopropyl alcohol and a clean rag.
Tips for a Successful Repair
- Work in a Well-Ventilated Area: Adhesives can release harmful fumes, so work in a well-ventilated area.
- Follow Manufacturer’s Instructions: Always follow the manufacturer’s instructions for the specific adhesive you are using.
- Apply Adhesive Evenly: Applying the adhesive evenly will ensure a strong and consistent bond.
- Allow Sufficient Curing Time: Allowing the adhesive to cure completely is essential for a long-lasting repair.
- Test the Seal: After the adhesive has cured, test the seal by closing the door and checking for any gaps or leaks.
When to Consider Professional Help
While gluing rubber car door seals is a relatively straightforward DIY project, there are situations where professional help may be necessary:
- Extensive Damage: If the seal is severely damaged or deteriorated, replacement may be a better option than repair.
- Complex Installations: Some car door seals are more complex to install than others. If you are not comfortable with the process, seek professional assistance.
- Lack of Experience: If you have no experience with automotive repairs, it may be best to leave the job to a professional.
Maintaining Your Car Door Seals
Proper maintenance can extend the life of your car door seals and prevent premature failure:
- Regular Cleaning: Clean your car door seals regularly with a mild soap and water solution.
- Apply Rubber Protectant: Apply a rubber protectant to the seals to keep them supple and prevent cracking.
- Avoid Harsh Chemicals: Avoid exposing the seals to harsh chemicals, such as car wash detergents and road salts.
- Inspect Regularly: Inspect the seals regularly for any signs of damage or deterioration.
Troubleshooting Common Issues
- Adhesive Not Sticking: Ensure the surfaces are properly cleaned and roughened before applying the adhesive.
- Seal Detaching: Use a stronger adhesive or apply more pressure during the curing process.
- Gaps in the Seal: Ensure the seal is properly aligned and seated against the door frame.
By following these guidelines, you can effectively gluing rubber car door seals and maintain the integrity of your vehicle. Remember to choose the right adhesive, prepare the surfaces properly, and allow sufficient curing time for a long-lasting repair. [See also: Car Door Seal Replacement Guide] [See also: Automotive Rubber Maintenance Tips] [See also: Preventing Water Leaks in Your Car]
