How to Close a Paint Can Properly: A Comprehensive Guide
Knowing how to close a paint can correctly is crucial for preserving the quality and longevity of your leftover paint. Improperly sealed paint cans can lead to dried-out paint, rust, and unnecessary waste. This guide will walk you through the necessary steps and best practices to ensure your paint stays fresh for future projects. Whether you’re a seasoned DIY enthusiast or a weekend warrior, mastering this simple skill will save you time, money, and frustration. Let’s dive into the details of how to close a paint can the right way.
Why Proper Sealing Matters
Before we delve into the step-by-step process of how to close a paint can, let’s understand why it’s so important. Paint exposed to air will eventually dry out and become unusable. The formation of a skin on the surface is a common occurrence, but if the entire can hardens, it’s a complete loss. Furthermore, an improperly sealed can can lead to rust formation, contaminating the paint. Proper sealing prevents air from entering the can, maintaining the paint’s consistency and color. Taking the time to seal your paint cans correctly is an investment in your future painting projects.
Tools You’ll Need
To effectively close a paint can, you’ll need a few essential tools:
- Rubber Mallet: A rubber mallet is ideal for gently tapping the lid back into place without damaging it.
- Clean Cloth: A clean cloth is necessary for wiping away excess paint from the rim and lid.
- Putty Knife or Screwdriver: This tool is helpful for gently prying open the can if the lid is stuck.
- Paint Can Opener: While not directly used for closing, a paint can opener is essential for opening the can in the first place and helps minimize damage to the lid.
Step-by-Step Guide: How to Seal a Paint Can
Step 1: Clean the Rim and Lid
The first step in how to close a paint can involves thorough cleaning. Use a clean cloth to wipe away any excess paint from the rim of the can and the underside of the lid. Dried paint can prevent a tight seal, leading to air exposure. Ensure both surfaces are free from debris and dried paint chips. A clean surface is crucial for an airtight seal.
Step 2: Position the Lid Correctly
Carefully position the lid on top of the can. Make sure it’s aligned properly. The lid should sit evenly on the rim. Avoid forcing the lid if it doesn’t fit easily. Check for any obstructions or dried paint that might be preventing a proper fit.
Step 3: Tap the Lid into Place
Using a rubber mallet, gently tap around the perimeter of the lid. Work your way around the can, applying even pressure. Avoid using excessive force, as this can dent the lid or damage the can. The goal is to create a tight, secure seal. Listen for a consistent sound as you tap; this indicates that the lid is properly seated. If you don’t have a rubber mallet, you can use a piece of wood as a buffer between the lid and a regular hammer.
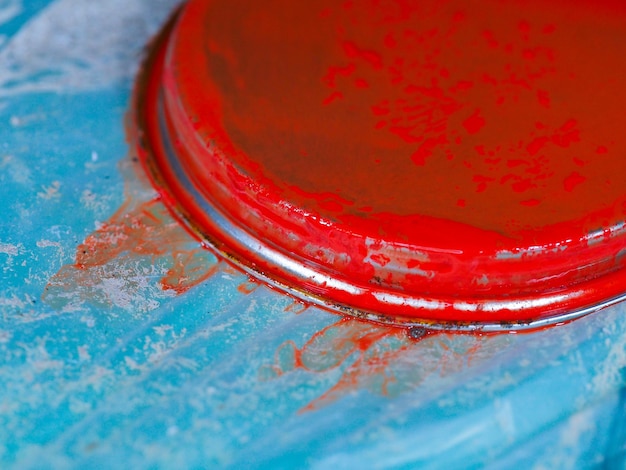
Step 4: Inspect the Seal
After tapping the lid into place, inspect the seal. Look for any gaps or areas where the lid isn’t fully seated. If you find any, repeat the tapping process, focusing on those specific areas. A well-sealed paint can should have a continuous, airtight closure. This step is crucial for preventing air from entering the can and drying out the paint.
Tips for Long-Term Paint Storage
Properly sealing your paint can is just one aspect of long-term paint storage. Here are some additional tips to help extend the life of your leftover paint:
- Store Paint Upside Down: Storing the paint can upside down creates a natural seal. Any air that remains inside will be at the bottom of the can, away from the paint.
- Avoid Extreme Temperatures: Store paint in a cool, dry place away from direct sunlight and extreme temperatures. Avoid storing paint in garages or attics where temperatures can fluctuate significantly.
- Use a Paint Preserver: Consider using a paint preserver product. These products create a barrier between the paint and the air, further preventing drying and spoilage.
- Label and Date Cans: Always label your paint cans with the color name, sheen, and date of purchase. This will help you easily identify the paint later and track its age.
Troubleshooting Common Issues
The Lid Won’t Seal
If you’re having trouble getting the lid to seal properly, the most common cause is dried paint on the rim or lid. Thoroughly clean both surfaces and try again. If the lid is bent or damaged, consider transferring the paint to a new container. [See also: How to Store Leftover Paint]
The Can is Rusted
If the paint can is rusted, it’s best to transfer the paint to a plastic container with an airtight lid. Rust can contaminate the paint and affect its color and consistency. Ensure the new container is clean and dry before transferring the paint.
The Paint Has a Skin on Top
If the paint has a skin on top, carefully remove it before using the paint. The skin is a result of air exposure and doesn’t necessarily mean the paint is unusable. Strain the paint through a cheesecloth or paint strainer to remove any remaining debris.
Alternatives to Paint Cans
While paint cans are the standard packaging for most paints, there are alternative storage options to consider:
- Plastic Containers: Plastic containers with airtight lids are a great alternative to paint cans. They are lightweight, easy to clean, and won’t rust.
- Glass Jars: Small amounts of paint can be stored in glass jars with tight-fitting lids. Ensure the jar is clean and dry before adding the paint.
- Paint Pouches: Some manufacturers offer paint in pouches, which are designed to minimize air exposure and extend the paint’s shelf life.
Environmental Considerations
Properly sealing and storing paint not only saves you money but also helps protect the environment. By preventing paint from drying out and becoming unusable, you reduce the need to purchase new paint, conserving resources and reducing waste. Additionally, proper disposal of unusable paint is crucial. Check with your local municipality for guidelines on paint recycling and disposal. [See also: Eco-Friendly Painting Practices]
Conclusion
Mastering how to close a paint can properly is a simple yet essential skill for any DIY enthusiast or homeowner. By following the steps outlined in this guide and implementing the tips for long-term storage, you can extend the life of your leftover paint, save money, and reduce waste. Remember to clean the rim and lid, position the lid correctly, tap it into place with a rubber mallet, and inspect the seal. With a little practice, you’ll be able to seal your paint cans like a pro. So, next time you finish a painting project, take a few extra minutes to properly seal your paint cans – your future self (and your wallet) will thank you. Knowing how to close a paint can is also important for safety, as it prevents accidental spills and exposure to harmful chemicals. The ability to effectively close a paint can contributes directly to organized storage and a proactive approach to home maintenance. Don’t underestimate the value of knowing how to close a paint can; it’s a small skill with significant benefits.
