The Ultimate Guide on How to Remove Decal Adhesive: A Step-by-Step Approach
Decals are a fantastic way to personalize your belongings, from vehicles to laptops. However, the sticky residue left behind when you remove decal adhesive can be a major headache. This guide provides a comprehensive, step-by-step approach to effectively remove decal adhesive without damaging the underlying surface. Whether you’re dealing with stubborn residue from old stickers or trying to clean up after a recent decal removal, we’ve got you covered.
Understanding Decal Adhesive
Before diving into the removal process, it’s crucial to understand the nature of decal adhesive. Most decals use pressure-sensitive adhesives (PSAs), which bond to surfaces under pressure. Over time, these adhesives can harden and become more difficult to remove. Factors like heat, sunlight, and the type of surface the decal was applied to can also affect the adhesive’s tenacity.
Understanding the type of surface you’re working with is equally important. A delicate painted surface requires a different approach than, say, glass or metal. Using the wrong method could result in scratches, discoloration, or even paint removal. Therefore, always test your chosen method on an inconspicuous area first.
Tools and Materials You’ll Need to Remove Decal Adhesive
Gathering the right tools and materials is the first step to successfully remove decal adhesive. Here’s a list of essentials:
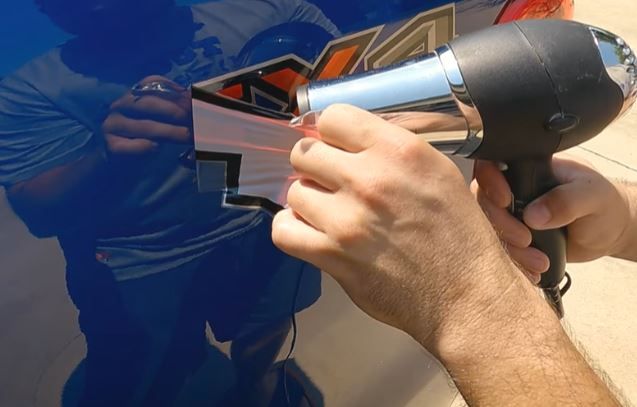
- Heat Gun or Hair Dryer: To soften the adhesive.
- Plastic Scraper or Putty Knife: For gently lifting the decal and residue. Avoid metal scrapers, as they can scratch surfaces.
- Microfiber Cloths: For wiping away residue and cleaning surfaces.
- Rubbing Alcohol (Isopropyl Alcohol): A versatile solvent for dissolving adhesives.
- Goo Gone or Similar Adhesive Remover: Commercial products designed specifically for removing adhesive residue.
- WD-40: Another effective solvent for breaking down adhesives.
- Vinegar: A natural and less harsh alternative for sensitive surfaces.
- Dish Soap and Water: For final cleaning and residue removal.
- Gloves: To protect your hands from solvents and chemicals.
Step-by-Step Guide to Removing Decal Adhesive
Step 1: Soften the Adhesive
The first step is to soften the decal adhesive. This makes it easier to lift the decal and remove the residue. Use a heat gun or hair dryer on a low setting. Hold the heat source a few inches away from the decal and move it back and forth to avoid overheating a single spot. Apply heat for about 30-60 seconds.
Step 2: Gently Lift the Decal
Once the adhesive is softened, use a plastic scraper or putty knife to gently lift a corner of the decal. Work slowly and carefully, applying heat as needed to keep the adhesive pliable. Avoid pulling the decal forcefully, as this can tear it and leave more residue behind. If you’re struggling, apply more heat and try again.
Step 3: Remove Remaining Adhesive Residue
After removing the decal, you’ll likely be left with some stubborn adhesive residue. This is where the different solvents come in. Start with the least aggressive option, such as rubbing alcohol or vinegar, and test it on an inconspicuous area first.
Using Rubbing Alcohol: Soak a microfiber cloth with rubbing alcohol and gently rub the residue. Let it sit for a few minutes to dissolve the adhesive, then wipe away with a clean cloth. Repeat as needed.
Using Goo Gone or WD-40: Apply the product directly to the residue and let it sit for the recommended time (usually a few minutes). Then, wipe away with a clean cloth. These products are more potent and may require more thorough cleaning afterward.
Using Vinegar: Soak a cloth with white vinegar and apply it to the residue. Let it sit for 5-10 minutes, then wipe away. Vinegar is a good option for sensitive surfaces, but it may not be as effective on stubborn residues.
Step 4: Final Cleaning
Once you’ve removed the decal adhesive, it’s important to clean the surface to remove any remaining solvent or residue. Wash the area with dish soap and water, then dry with a clean microfiber cloth. This will leave the surface clean and free of streaks.
Specific Surfaces and Considerations
Removing Decal Adhesive from Car Paint
Car paint is delicate and requires extra care. Always use low heat and avoid harsh chemicals. Rubbing alcohol, Goo Gone (specifically formulated for automotive use), and WD-40 are generally safe options. After removing the residue, consider waxing the area to protect the paint.
Removing Decal Adhesive from Glass
Glass is more resilient, but it’s still important to avoid scratching it. A razor blade can be used carefully to remove stubborn residue, but be sure to hold it at a shallow angle to avoid damaging the surface. Glass cleaner can be used to finish the job and remove any streaks.
Removing Decal Adhesive from Plastic
Some plastics can be sensitive to certain solvents. Test any cleaning solution in an inconspicuous area first. Rubbing alcohol and mild dish soap are generally safe options. Avoid using abrasive cleaners or scrub brushes, as they can scratch the plastic.
Removing Decal Adhesive from Walls
Painted walls can be tricky. Start with the gentlest methods, like warm soapy water or a mixture of baking soda and water. If those don’t work, try rubbing alcohol or vinegar. Be careful not to rub too hard, as this can damage the paint. Always test in an inconspicuous area first. [See also: How to Repair Wall Damage After Removing Decals]
Preventing Future Adhesive Problems
To minimize future headaches with decal adhesive, consider using decals with removable adhesive. These decals are designed to be easily removed without leaving behind residue. When applying decals, make sure the surface is clean and dry. This will help the adhesive bond properly and prevent it from becoming overly sticky over time.
Troubleshooting Common Issues
Stubborn Residue That Won’t Come Off
If you’re dealing with particularly stubborn adhesive residue, try letting the solvent sit for a longer period of time. You can also try using a combination of methods, such as applying heat followed by a solvent. For very tough residues, consider using a specialized adhesive remover designed for industrial use.
Damage to the Underlying Surface
If you accidentally damage the underlying surface while removing the decal adhesive, don’t panic. Small scratches can often be buffed out with a polishing compound. For more serious damage, you may need to repaint or repair the affected area. [See also: Guide to Surface Repair After Decal Removal]
The Decal Tears During Removal
If the decal tears during removal, it can be more difficult to remove the remaining pieces. Use a small, pointed tool to carefully lift the edges of the torn pieces. Apply heat as needed to soften the adhesive. Be patient and work slowly to avoid further tearing. Consider using a specialized decal removal tool for particularly delicate decals.
Conclusion
Removing decal adhesive can be a frustrating task, but with the right tools, techniques, and patience, you can successfully remove even the most stubborn residue. Remember to always test your chosen method on an inconspicuous area first and to use the gentlest approach possible. By following the steps outlined in this guide, you can keep your belongings looking their best and avoid the dreaded sticky mess. Successfully remove decal adhesive and enjoy a clean, personalized surface. The key to effectively remove decal adhesive is preparation and patience. Take your time, use the right tools, and don’t be afraid to try different methods until you find what works best for you. Good luck!
